KyMotoVan Gets an Upgrade
Door Trim Envy
We’ve been very pleased with the Sprinter. Its the perfect fit for how we travel and recreate. Honestly, we’ve done very little in terms of upgrades since 2016. I spent several months getting things the way we wanted immediately after the purchase, but since that time we just put it to use!
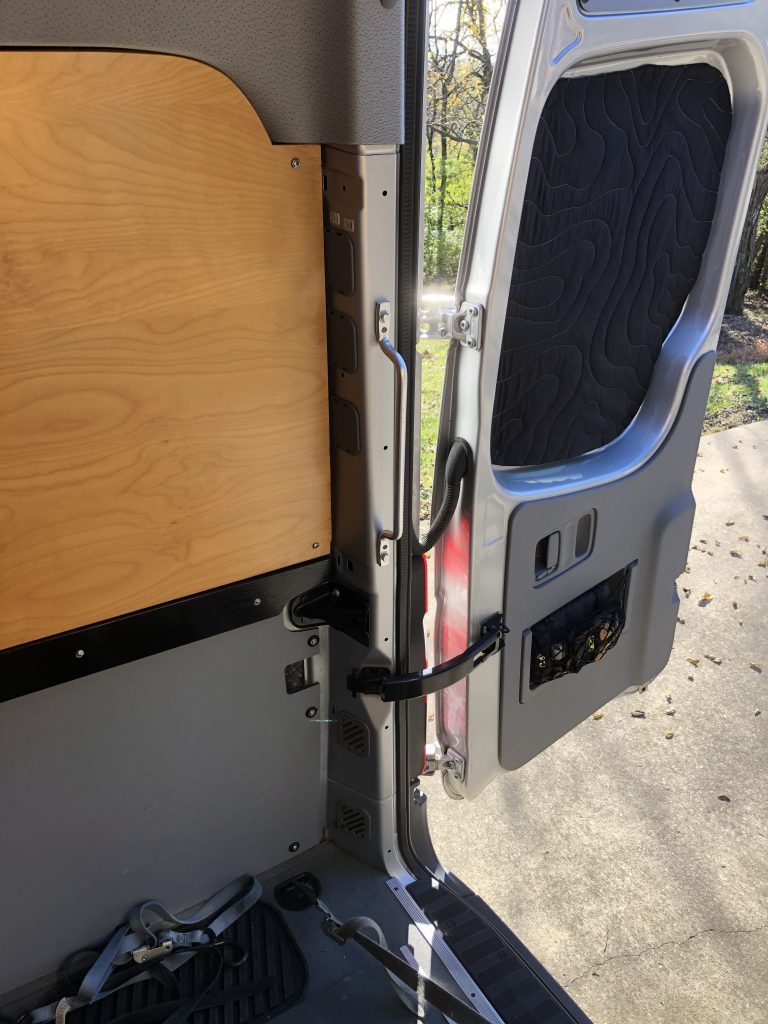
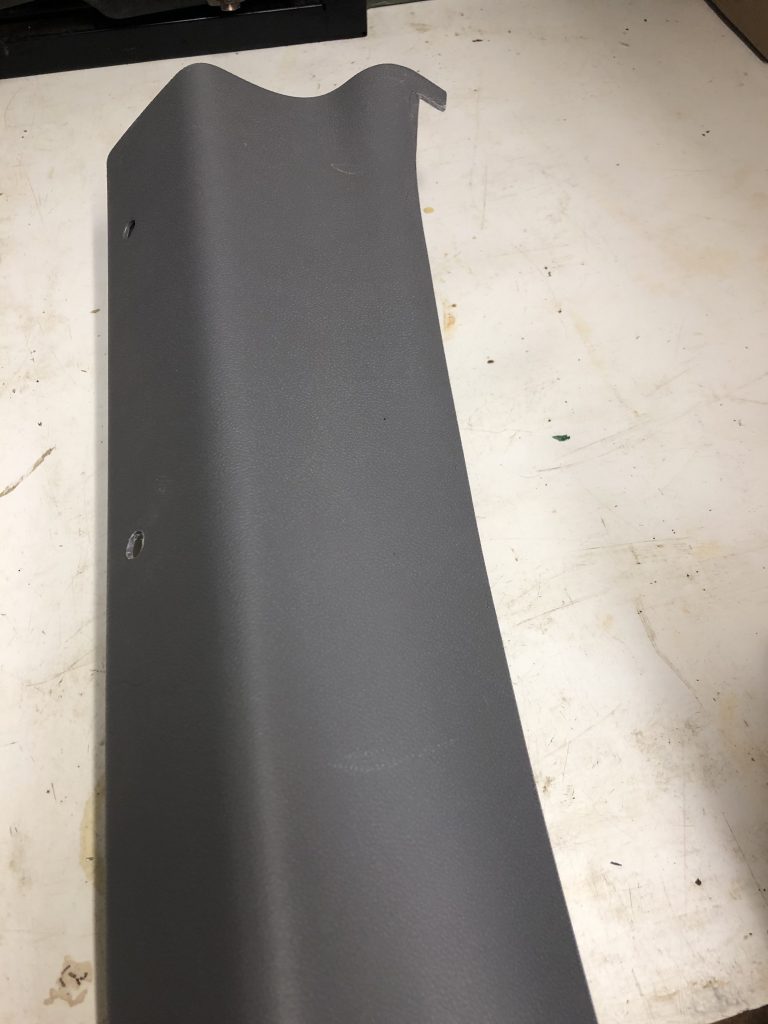
A couple months ago, while attending the Upper Cumberland Dual Sport, my riding buddy JRow opened the rear doors on his 4×4 Sprinter and exposed an upgrade that I needed. He had procured factory rear door trim for a Sprinter Passenger van that covers up the metal D-pillar between the floor and the headliner. That trim, coupled with the factory grab handles, was much cleaner looking than my setup.
JRow told me where he found the part numbers but I forgot. After poking around on SprinterSource I found his post on this topic complete with part numbers. The best deal for me was MB of Fort Mitchell, Kentucky. Shipping was reasonable and the service was great.
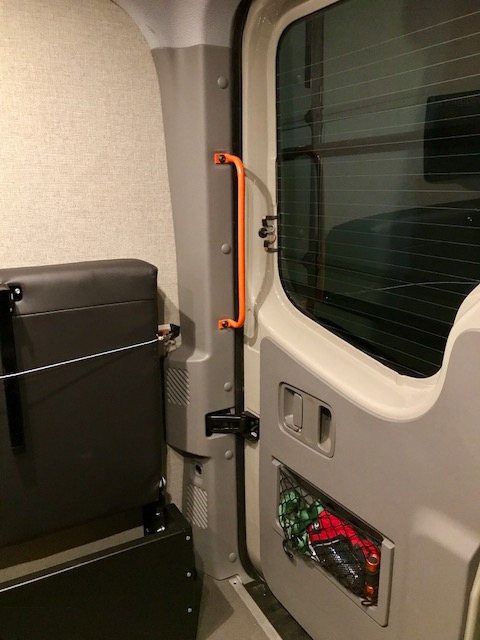
(This is my goal)
The cool thing about the trim was that each side had a hole for a 12 volt accessory (cigarette lighter style) socket. I didn’t want two empty holes back there so the decision was made to put them to use. Unfortunately, MB did not run the wiring for this option unless it was ordered from the factory. Geez. A project ensues.
The Handles
This was just not as easy as you’d think. Note the orange handles in the photo above with the 90 degree bend just before the mounting hole. I had one of those from an MB sliding partition door. It was a very dark gray (or is it grey?) but at some point I’d painted mine black and laid it up on the shelf in the garage.
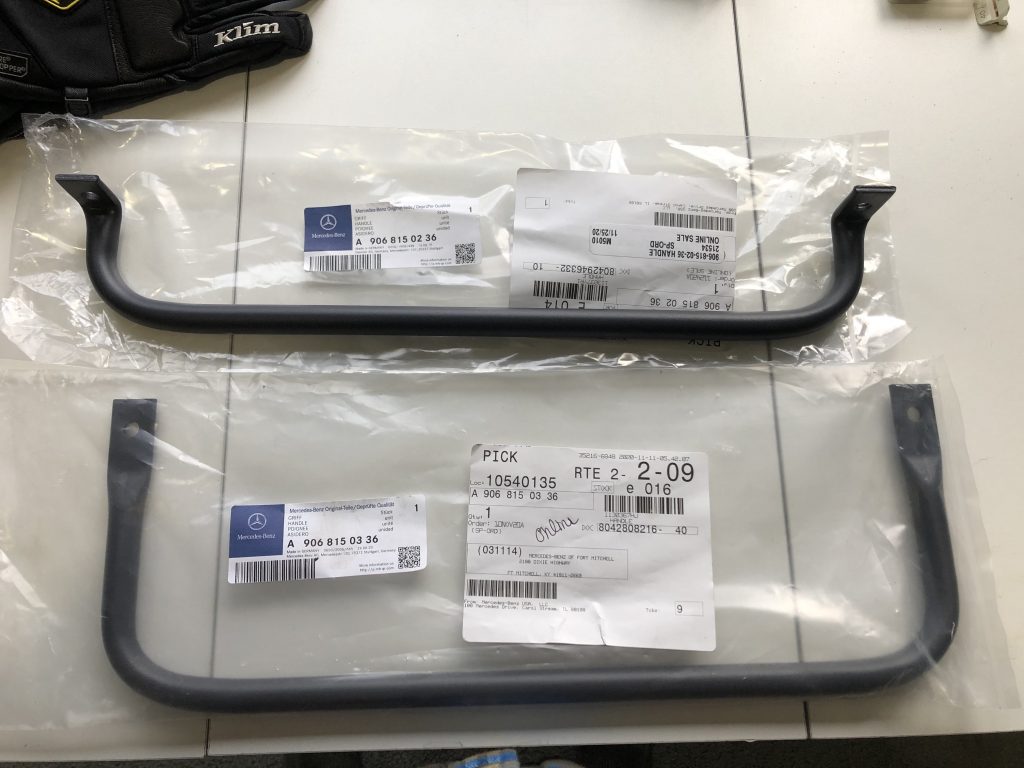
So I get online to find some handles. The MB parts catalog shows two handles for the rear entry area but there are no photos. Same part number for each side. Assuming those match what I currently have, an order is placed. That along with an MB 12v accessory outlet. Below is what I got.
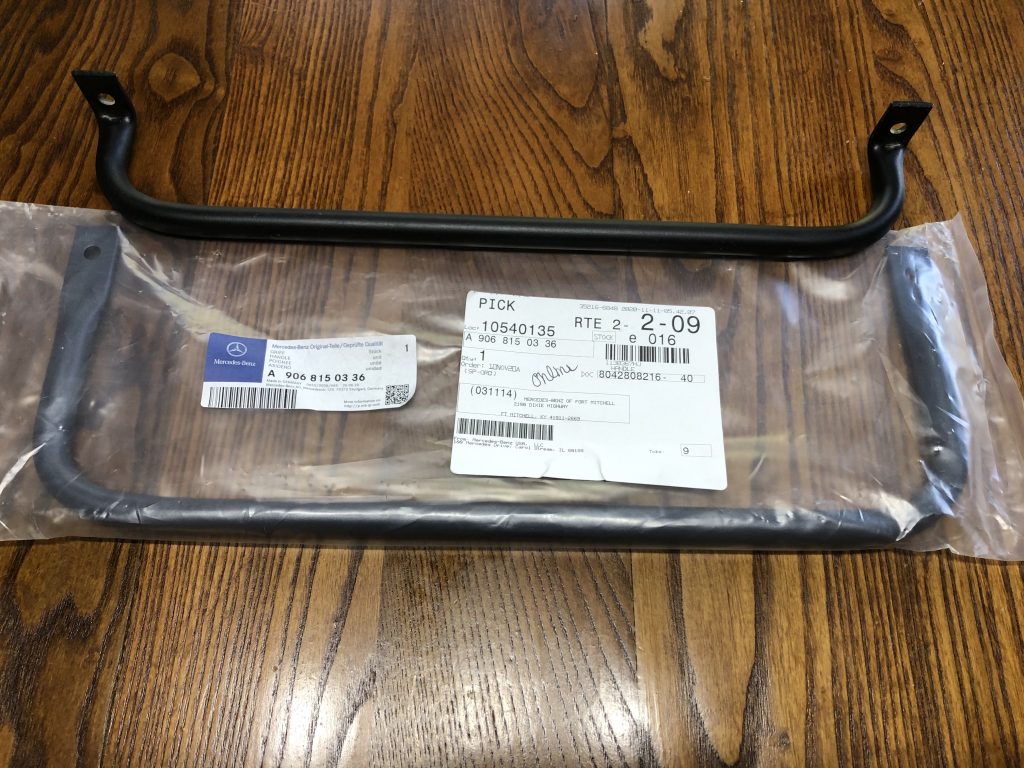
Sigh. As you can see I did not get the correct handle. I sent this photo to MB of Fort Mitchell and they said I needed another part number. Many thanks to them for taking the time to look it up for me. In the end, only one value differed in the two PNs (see below).
As you might expect, I was unable to find the can of black spray paint I’d used to paint that partition handle 3-4 years ago. Not wanting to venture out into our COVID-19 impacted world, an order was placed on Amazon for a can of Krylon premium satin black spray paint. Both the new and the old handles were painted to match.
Making the Connections
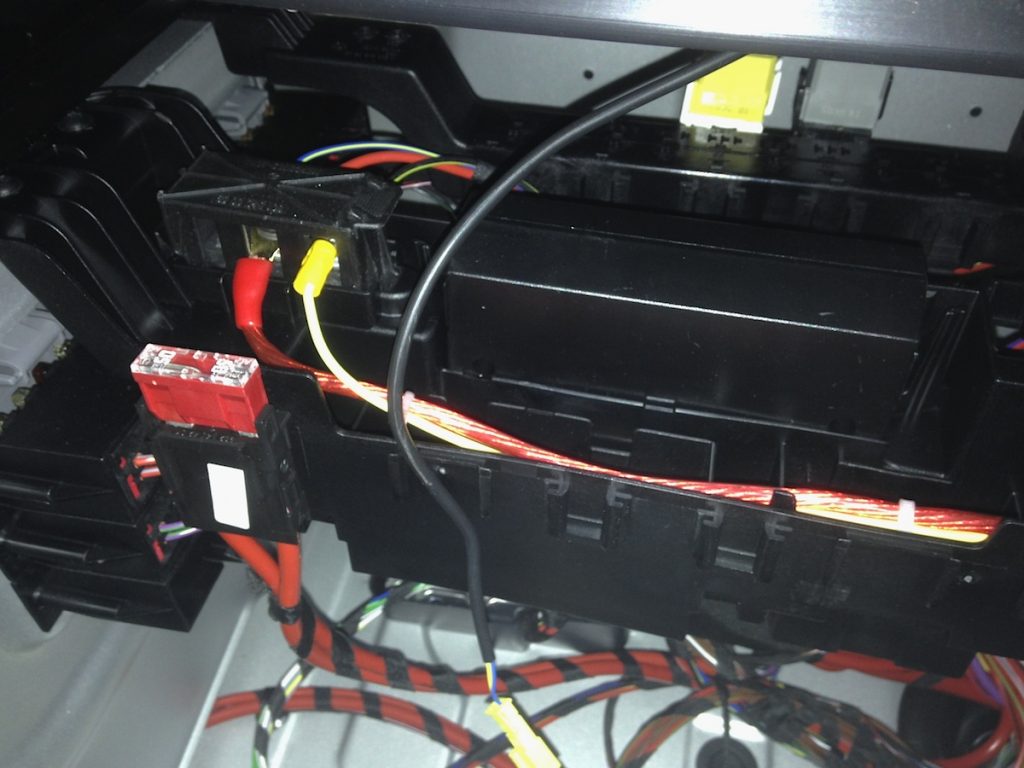
This type of project is always enjoyable for me. I’ve been doing 12v wiring projects since the mid-eighties when I started doing car stereo installs. As noted above, MB doesn’t include the wiring necessary to hook up those two 12v accessory outlets in the rear door trim so getting power to the rear of the van was in order.
The best, and recommended, 12v power source on a Sprinter are the EK1 terminals under the drivers seat. Getting two wires from the rear up to that area wasn’t too difficult but it required patience and a few body contortions to make it happen. Dad had a couple spools of 14 gauge red and black wire that I neatly tucked under the edge of the plywood floor and rubber mat along the entire length of the van. The wires dropped down out of site, laid neatly on the metal floor and emerged in the front and rear in safe and convenient locations. My partition and the fender well box were the hardest two obstacles to overcome.
Getting power over to the passenger side D-pillar was accomplished by running two wires up the interior of the pillar and then up and over the headliner. Doing this required the removal of those gray push bottom fasteners. I was careful and didn’t mess any of them up but you might be wise to have some spares on-hand for this upgrade.
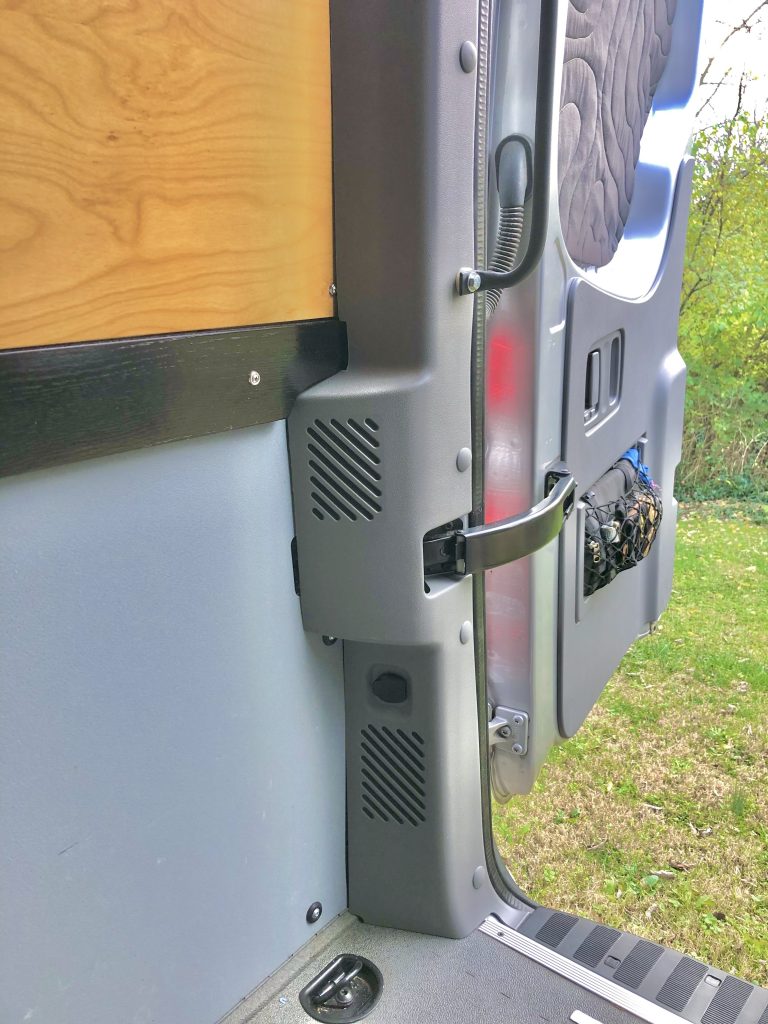
An upgrade I did in early 2016 was to add a small computer fan in the bottom square vent back in the D-pillar. Below that vent, in the bottom of the pillar, is a vent behind the side portion of the bumper. The fan was placed so that it pulled a vacuum on the cargo area and push the air out the vent. I’d turn it on when we’d stop for the night so there wouldn’t be gas fumes in the main cabin area the next morning. Worked like a charm! I’ve only used the darn thing 3 or 4 times but it was powered by a little 12v battery pack. Now was the time to wire it up directly, no more battery pack.
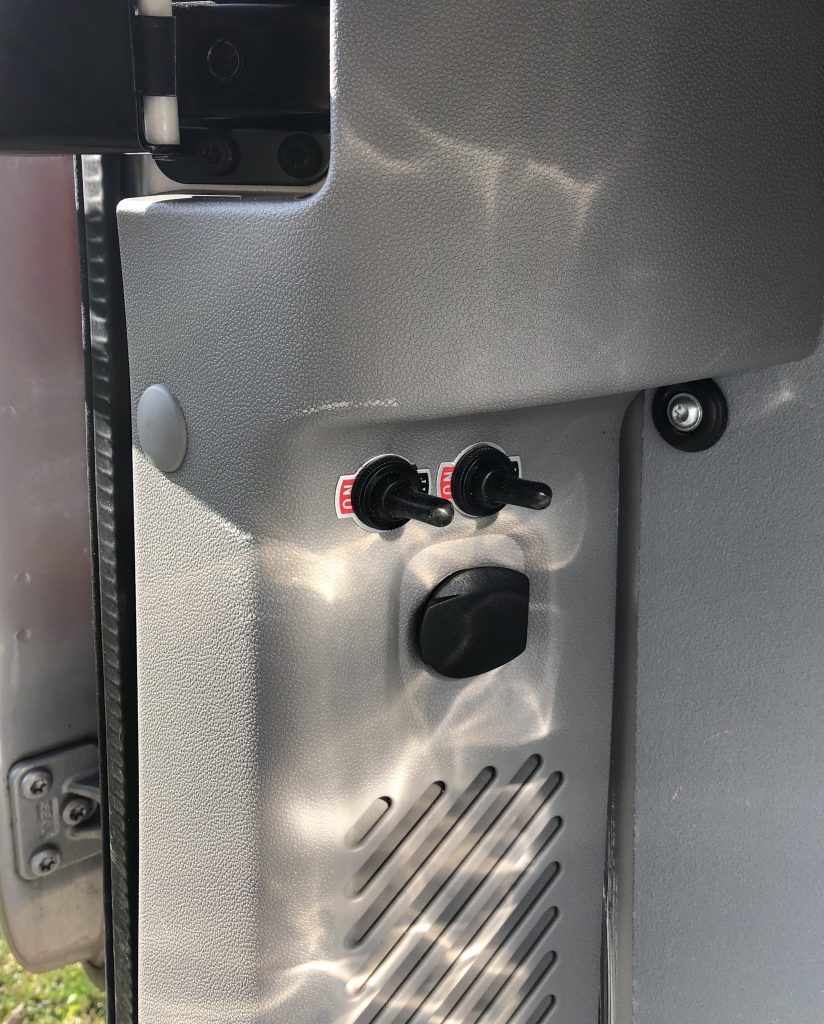
Two switches were installed on the driver’s side trim just above the 12v outlet. One is for the 12v accessory outlets and the other for the aforementioned exhaust fan. I found the SPST switches on Amazon, geez there are a lot to choose from.
Trim Modifications
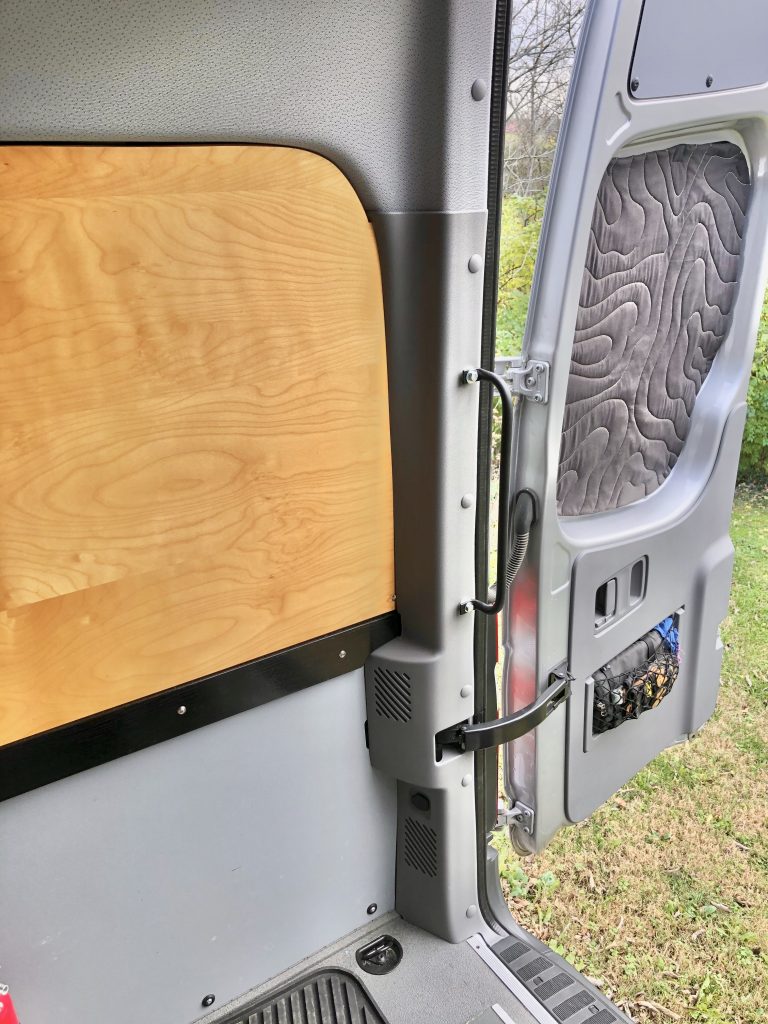
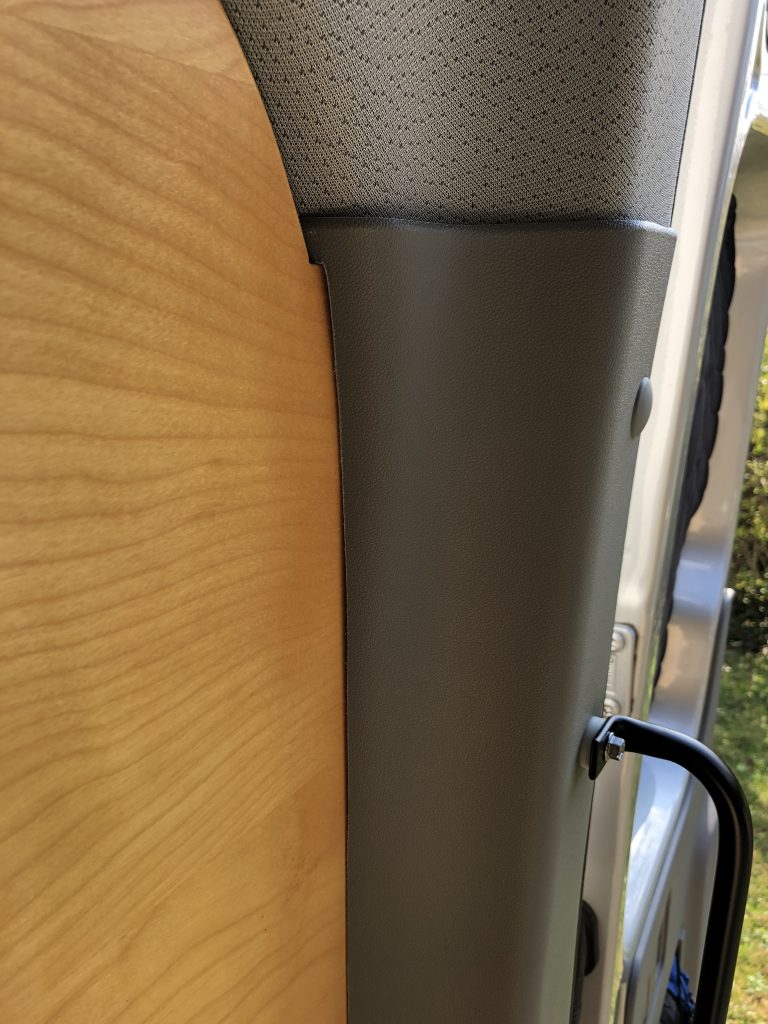
Unlike other Sprinters, the rear panels in our cargo area are covered with very nice, cabinet quality, maple plywood. Those two panels weren’t cheap and the work that went into finishing and mounting them in place was substantial. The thickness of the wood raises the surface about one inch from the standard metal surface that the trim was designed to rest against. Removing and trimming the wooden panels was off the table.
This required me to modify each piece of plastic trim by removing a certain amount along one edge. Unfortunately, it wasn’t really a straight line but more of an arc. I used a new hack saw blade with one end wrapped in Gorilla tape to hand saw the trim and one of those Dremel multi-tools to smooth out the edge. Patience was required. This was not a quick task. Note the notch at the top right and sweeping arc along that edge.
Holes had to be drilled for the grab handles which proved to be a bit tricky. I’ve seen the handles fastened with nothing behind the trim but that collapses the plastic. Furthermore, the option of cutting out a hole and then placing the handle against the metal surface just degraded the whole look. In the end, I glued some very thick poly washers on the inside of the trim and then placed another one between the trim and the grab handle. It’s secure, looks good, and works well.
The Finishing Touch
One minor thing continued to bother me though. Those bolts and associated washers holding on the handles just looked too “industrial”. Not finished. Rough. After poking around a bit in the garage I found the perfect alternative, Yamaha handle bar clamp bolts. They’re high quality, have a flange that negates the need for a washer, and they’re shiny! The length was spot on and I had some extras on hand from where I’ve swapped them out for the Scott’s Steering Damper setup over the years.
The whole effort probably took less than 4 hours but those hours were spread out over a 3-4 week period. Ordering the parts, the paint, the mix up with the handles and inclement weather all contributed to the effort’s duration. Glad to have it done though and pleased with the outcome.
See you on the trail!