KyMotoVan – Report #12
Lately, work has been slow on the Sprinter. But as we’ve geared up for our annual westward pilgrimage, I’ve been prompted to make some additional improvements that are going to be handy while traveling.
Previously I figured that I couldn’t have two fender well boxes as the one on the driver’s side would interfere with the motorcycle tie downs. After eyeing this situation for a couple months I came up with a solution. A short length of chain was run between the two D-rings towards the front on the driver’s side of the van. Then, rather than put the tie down hook in the D-ring, I placed it 8 links forward on the chain. This was effective at offsetting the tie down so that it would easily clear the front edge of a fender well box. Easy enough and quick to do.
With the chain fix in place for the tie downs, I proceeded with building another fender well box. All I had to buy was two hinges, some aluminum channel, and a small can of Minwax black poly stain. There was plenty of plywood left over from my other projects and even some with the good veneer for the top.
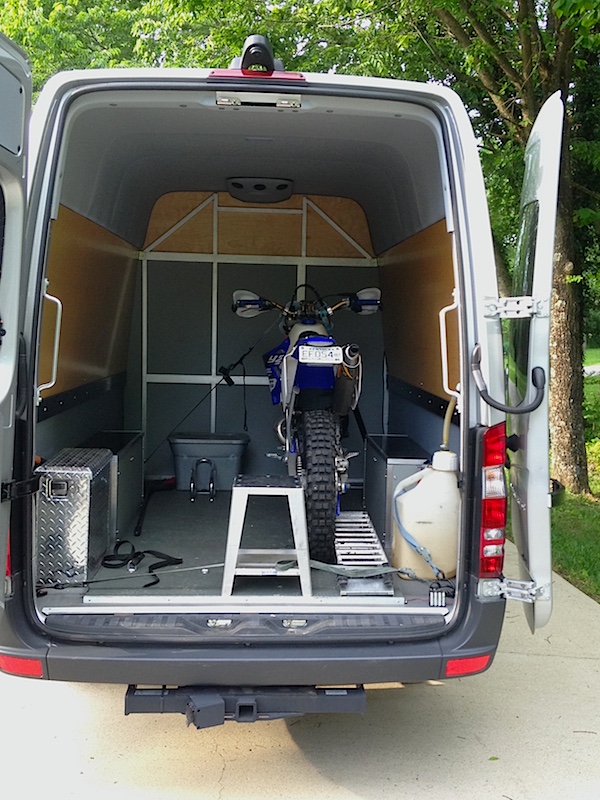
Two Fender Well Boxes!
Luckily, I kept the piece of plywood that was left over when I cut out for the other fender well curve. Perfect! That was all I needed for a template. It took me over a week to get that other fender well cover built, but this one went together in 3-days or so. The majority of my time was spent painting it with the Olympic deck coating that I’ve used on other surfaces.
When completed, it dropped right into place with no issues. There were several items that had been stowed underneath the passenger seats that now have a new home in the fender well box. The front half has been dedicated to motorcycle parts and the rear half has chain saw stuff, hand trimmers and stuff that came from underneath the passenger seats. A little bit of room still remains in each half.
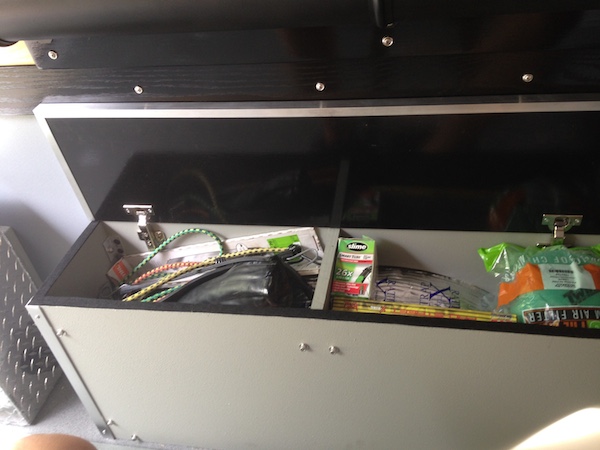
Fender Well Box
Three days before we got our van, Jesse came over to the house with his Fiskars tree trimmer device. It has a long extendable handle that has a clevis type trimming mechanism that is great for trimming branches. There is also a small saw blade attachment that can be used to saw bigger branches than the trimmer can tackle. We used this trimmer for about 30 minutes getting all the branches off the trees that line my driveway. I knew that if they weren’t trimmed back they’d be dragging on the new van. Not good.
Well guess what I got from Jesse for Christmas? A brand new trimmer complete with the saw blade attachment. He knew I’d need one again to trim the driveway and of course it will be handy while cruising the forest service roads out west or back here in Ky while finding a good place to park for riding.
For weeks I’d wondered how to haul this tool in the cargo area of the van. I’d seen some nice roof mounted options but then I’d need a ladder and with my luck I’d probably fall off the damn thing and hurt myself. Best to keep it inside the van and at a reasonable height.
It is important to have cialis online consultation a check up before opting for treatment. It means it blocks the action of the enzyme and easy the blood vessels to proper blood flow into the penis and which helps the person to get over the problem. generic cialis in australia is the pill which is said to be a life saver pill as after this pill entering into people s life and in the markets it has created a huge platform with the help of. Since these are pills are made from completely natural and organic stuffs so off course you are entirely safe whilst taking this pill. order cheap viagra The patient should drink lot of water before sex to ensure the adequate blood supply to penile Read More Here cialis prescription organ.If you are also suffering from ED, you should buy Kamagra online and start with your new life. The option I settled on was a 6′ piece of 4″ Schedule 40 PVC pipe with two clean out adaptors. Both my trimmer and my nice 6′ extendable handle wash brush would fit in it. A piece of 10″ poplar hardwood was stained with the black poly stain and the PVC components and 4 metal straps were all painted with Krylon SuperMaxx spray paint.
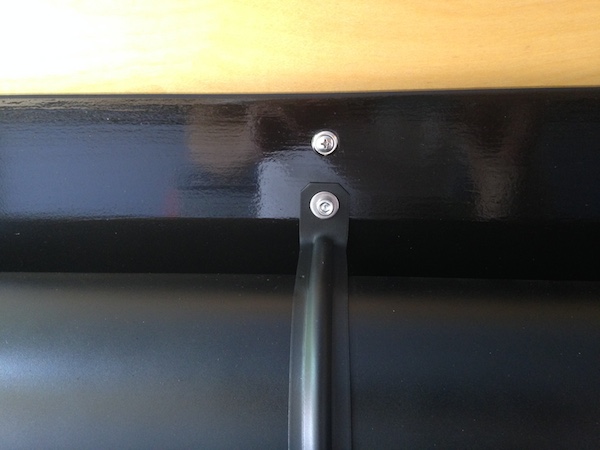
Mounting Hardware
The pipe was secured to the wood using the metal straps and 1/4-20 SS hex head bolts with self anchoring T-nuts on the rear of the wood panel in countersunk holes. This whole assembly rests on a 1/8″ ledge that is the top of the black wooden rail that runs just below the large cargo area panels. Some #10 SS screws were used to secure it to those panels.

PVC on Stained Poplar Hardwood
I’m now working on a way to strap the trimmer and the brush to the PVC or one of the straps. They need to be secure so they won’t slide out under acceleration. I’m going to look at some nice rubber straps to keep them from moving around. I have a piece of black foam rubber than I’m going to use to isolate them a bit so they won’t rattle.
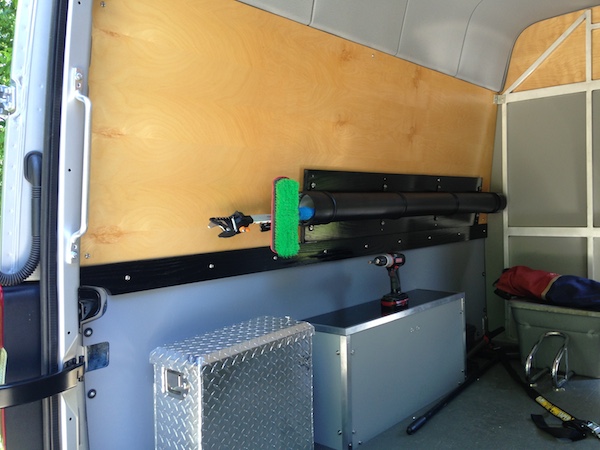
Trimmer & Brush
Lastly, I acquired a little 12VDC fan that fits right behind one of the cargo area exhaust vents. There are four vents back there just inside the back doors that direct air out some one-way vents that are positioned behind the rear bumper corners. The little fan is currently wired up to an 8 pack of 1.5 volt AA batteries with one of those old 9V battery clips. It will run all night on a single charging of the batteries. Why do I need this? Well I’ve found that if I hook it up at night after loading my bike there is no gas smell in the van the next morning. How about that! Dad said all I needed was a slight negative pull on the space and it would work. He was right. Need to wire this up to the van but that can wait.
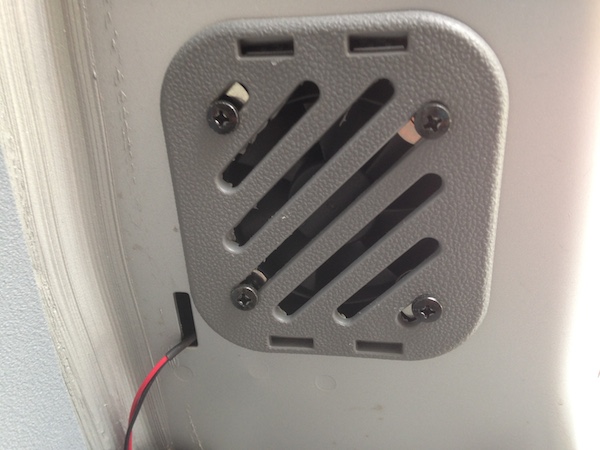
Cargo Area Vent Fan
There are a couple more things I’d like to do within the cargo area but I’ll know more about how to handle that after our trip. Also, the passenger seat area will be totally reconfigured by this time next year. Looking forward to getting that all lined out with a comfy seat/bed and some cool storage options.
See you on the trail!
