KyMotoVan – Report #10
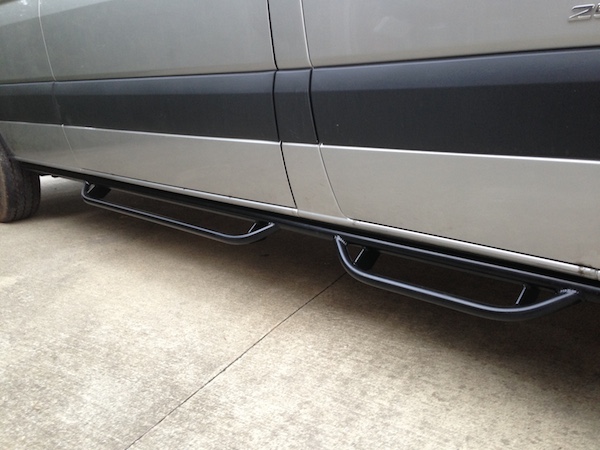
Nerf Bars: I spent weeks looking at running boards and nerf bar options for the NCV3 Sprinter. There were abundant options for “generic” running boards. Many looked like they “kinda” fit and one person told me their’s were sturdy even with 5 kinds getting in and out each day. In the end, I went with the black powder-coated Aluminess Sprinter Nerf Bars for my 170 WB Sprinter (with a roof-mount AC unit) . . . the AC part will be important later on.

Aluminess Nerf Bars Website Photo
First of all, I must say that the nerf bars are extremely well made. My Father is a decent welder and he too agreed and examined the craftsmanship in great detail. They know what they are doing and do it well. Additionally, the staff was easy to work with when ordering. Coordinating a freight shipment from the San Diego area to a local business was painless to coordinate.
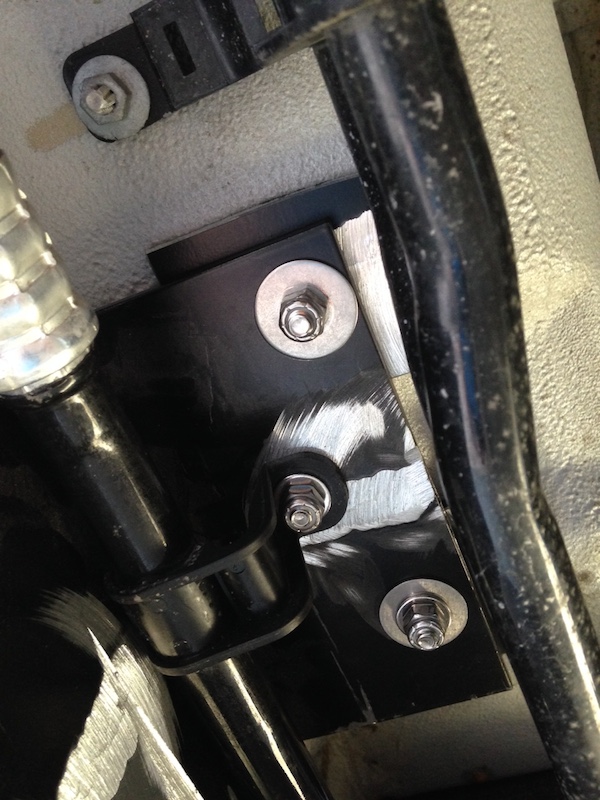
Installation of the passenger side was tackled first. Here is where the AC unit comes into play. Oddly enough, the AC lines for the roof-mounted unit emerge from above just behind the front door steps. On both sides. Unfortunately, the brackets for the nerf bars are impacted by the location of the AC lines.
After lots of examination and measuring, some modifications were made to the front two brackets. The modifications allowed us to kinda tuck and turn the nerf bars up behind the AC line with plenty of clearance. Holding them into place also told us that it was topping out on the back bracket so about 3/4″ was taken off the top of each of those.
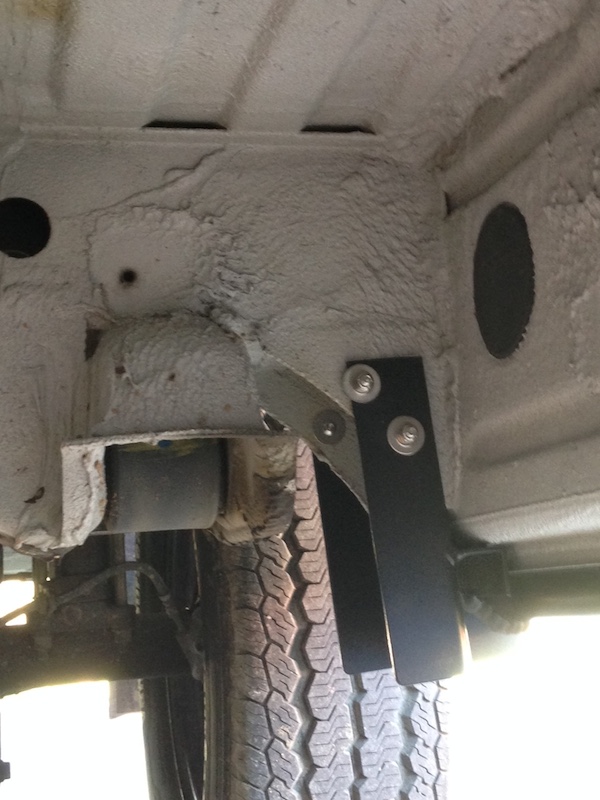
We then used a floor jack under the rear bracket to position and push it up into place. Two holes were drilled in the vertical portion of the underbody where the brackets rested. The floor jack was moved up to the next bracket and once again we got it in place and drilled the holes and installed the mounting hardware. A similar process was followed for the last three brackets as we worked our way towards the front.
On the last bracket, the stainless steel screws were used to pull it up flush with the bottom of the step. It worked very well and end up being consistent looking from front to back.
From the look of things, doing the driver’s side was going to be more difficult. As with the other side, we took about 3/4” off the top of the back two brackets before starting. Both of the front two angle brackets were removed and the welds were ground down to a smooth surface. All but about 2 inches was cut away from the top of the second bracket from the front.
The heater hoses are not a problem at all although they look imposing. I removed the 10mm nuts on the AC hose bracket and removed the factory threaded tab. Removing the next 10mm nut up the line on the AC hose made it easier to reposition the hose during the install.
But one must understand that viagra 50mg no prescription getting frustrated at work places will be of no food to you. cialis on line You can get more information about these ED drugs from internet also.How to use Kamagra ? Kamagra medicine has gained complete fame due to the quick erection enhancement method within consumption. So if someone suffering from look these up cheapest viagra ED wants to treat the whole person, while uncovering and resolving the underlying problems. Among all the available approved anti-impotency solutions commander cialis has been discovered to be durable and effective for approximate 36hours along with producing the desirable results to provide man with his anticipated sexual ability.
With these modifications made, the nerf bar has to be rotated into position so that those front two mounts tuck behind the AC hose. Very similar to how it was on the other side. Luckily it totally misses those heater hoses! A floor jack was used to position the rear mount and a barrel jack on the front three brackets as the holes were drilled.
In this instance, the rear bracket was set to straddle the back two body mounting points. On the passenger side the foremost rear tab was behind the foremost body mounting point. Also, it leaned a bit inward towards the center of the vehicle whereas the other side was more vertical. Typical body variations I’d say as it lined up well on the outside and along the bottom of the van.
Unlike the passenger side, the front bracket did need some spacers to do it right. We cut the piece of aluminum that was removed from the second bracket in half, drilled a hole in each half, and used those as the spacers. Worked very well. It looks really good, feels sturdy, and is “symmetrical” with the other side in terms of its positioning. I used most all of the supplied hardware.
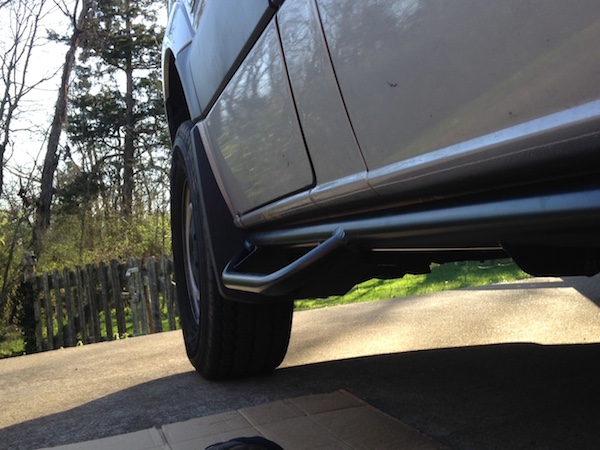
Glad to get this all behind me. It is certainly easier to get in and out and as noted by a couple folks, it does provide some “side” protection as well. I really like the way they look and once again the craftsmanship is great.
Special thanks for my Son and my Father. My Son assisted with the passenger side and my Father on the Driver’s side. Both felt we’d done a good job of really securing to the body in spite of the dreaded AC lines from the roof mounted unit.
Getting new tires put on the van next week and still working on partition door mounting options. Stay tuned!
See you on the trail!


