So far this year a handful of projects have required me to try some new and different things. This wasn’t the result of some New Years resolution or plan on my part; it just came about that way. Although trying new things can be challenging it is always good to stretch yourself a little.
I recently finished my first Buggy Barn pattern. I had a great time with their method which is a stack and whack technique. They are fun to do and really forgiving too. As you can imagine my fabrics are much brighter than the typically muted tones of the Buggy Barn quilts. The pattern is called “Crazy Dog Days”. My inspiration for this quilt is Andy Worhol’s pop art; here is a picture of the finished top:
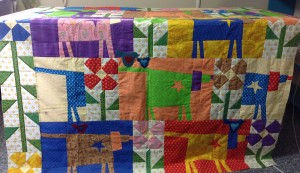
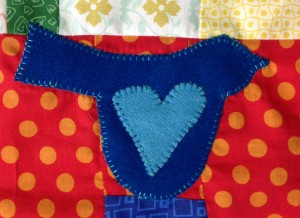
This quilt includes birds with hearts that are appliqued in wool. Applique is not a technique I use much; most of the applique I have done is in classes so this is a little bit unfamiliar (and so a little scary) for me. I had also never worked with wool before, but felt the wool would really add a nice texture to the quilt. I found a great tutorial on wool applique on Quiltmaker blog which was very informative and made me feel more comfortable about it. After a little debate with friends over whether to applique by hand or machine I decided to go with machine applique. I was lucky to be working on this with friends many of whom have done much more applique than I. I used a blanket stitch around both the birds and hearts in a matching thread color. I had little trouble stitching around the birds; the key is to go slowly. Here is a close up of the stitching around the birds.
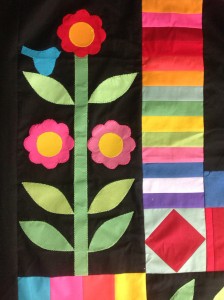
While I was working on the dog quilt I was also finishing up a block of the month called Amish with a Twist. One border has applique on each of the corners. It is a stem, flowers and leaves. I thought it would be cute to add a bird to he applique too and reduced the size of the birds from the Buggy Barn quilt and added one to a leaf on each corner. Once again I did the blanket stitch around the birds. These were a little harder since they were smaller, but I think the stitching still looks good. Here is a close up of the applique:
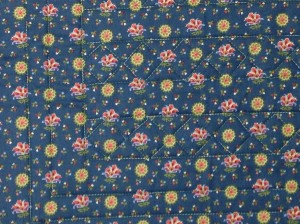
I also had a little pattern for a mini quilt called “Crutons” by Kaye England which I pulled out and finished up recently. It is so cute, finished size is ” x “. I had my quilt sandwich ready and was going to go ahead and get my binding ready when I noticed that the backing fabric would make better binding than what I had planned on using. I had a decent bit of excess fabric on the back and realized I could pull it to the front for binding which I have seen done before, but never done myself. I found a tutorial online and found this is a really easy method. Here is a picture of the front.
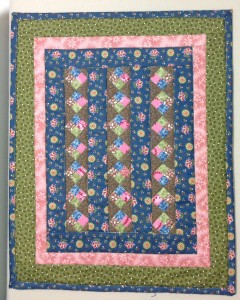
After some debate, I did very simple straight line quilting which I think looks perfect on this little quilt! You can really only see the quilting on the back
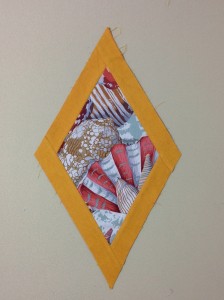
Years ago a friend and I collected every color way we could find of a design by Kaffe Fasset with large shells. The pattern we chose for these fabrics is all diamonds with sashing around each diamond. For some reason I have always wanted to make a quilt with diamonds, but have never gotten around to it. The diamonds are large in size and perfect for these large scale prints. For our sashing we chose to use shot cottons. Amongst us we had a nice collection which we supplemented with some peppered cottons we found. For the diamonds we had to make templates. Only on a couple occasions in class had a I used templates. In the end, making and tracing the templates and cutting out the diamonds wasn’t too big of a deal. We got all diamonds cut and strips for the sashing cut out in an afternoon. Matching up the different prints with shot cottons was a lot of fun. I think this quilt will end up being very striking. Here is one finished block:
At the beginning of the year I started a year long class with friends in Louisville. The class is taught by Mary Bauer; the quilt (Contemporary Sampler) won her an award at the AQS show in Grand Rapids Michigan. This creative quilt combines many quilting techniques including fussy cutting, applique, and paper piecing. In our January class we used a “magic mirror” to audition what our finished kaleidoscope would look like. Then we fussy cut our focus fabric using templates. Like all other classes I especially look forward to seeing how all the different quilts come together; each person in the class has extremely different sets of fabrics and colors. I am excited with how my first month’s blocks turned out and looking forward to learning a lot more throughout the year in this class.
Sew long from the Quilter on Osage Hill!
a thought by Patricia Isaman
I love your blog! What fun!
a thought by Jackie Silvers
Wow, Kim! We are only a month and a half into the new year, and look at how much you have already accomplished. Great blog!
a thought by Lisa Burke
As always, very good Kim! You are so productive and creative. You have come a long way, baby! I expect to see your quilts in quilt shows very soon.
a thought by Mary Ann
Thanks for sharing all the new techniques that you have tried.