
The New Travel Machine – Report #3
Audio Upgrade: As noted in the previous post, something had to be done with the sound system. My initial plan was to only replace the door and dash speakers but after digging around a bit I found some nice components that had been stashed away at home, some for over three decades!!
First of all I located this old Proton amplifier that puts out 30 watts per-channel and was used to power some 4″x10″ Blaupunkts that were in the lower door panels in my 1978 Chevy El Camino. The plan is to mate those with some brand new Blaupunkt Blue Magic TL 160
6-1/2″ 3-way car speakers using Hein’s Sprinter Van door mount adapters.

Blaupunkt Door Speakers
Secondly, I have two Bazooka subwoofer tubes. The one I decided to use is about 8 years old and is an 8″ version. I’d used this tube with a nice Alpine V12 Mono Subwoofer Amp in a 2001 Ford F-150 that our Son drove for 3 years or so. I looked all over the house for that subwoofer amp and finally found it in the garage with an inverter that someone gave me a couple years back. Good to go on that front!
After much research I decided to just stick with the Audio 15 head unit that came in the Sprinter. I know it doesn’t have low level RCA outputs but I’m afraid to lose all the functionality of the backup camera, AUX input options, and so forth. Plus it looks and works just fine. I have two high to low level input converters that will be employed in order to connect the radio to the amps. I know that wouldn’t do for a true audiophile but I’m at the age where that kinda stuff doesn’t matter as much as it did when I was in my teens.
Under the passenger seat is the ideal place for the amplifiers. I started out by lining the bottom with some sound proofing material. Afterwards, I took a small piece of 1″x4″ pine and cut it to fit across the back of that compartment. There are two holes near the floor that I used to secure the piece of wood so no new holes were drilled. Two stainless steel 1/4-20 machine head screws, two washers, and T-nuts were used to secure it. The top of this piece of wood is nearly level with the little ledge across the front of the compartment. This allowed me to create a platform where I could mount the amplifiers and route all the wiring in a tidy fashion.

Amplifiers
Luckily there is a very useful channel between the seats that I used to route a constant and switched hot for the amps. The EK1 terminal under the drivers seat is perfect for this sort of application. It makes for a very clean and protected install that doesn’t require pulling wires into the engine compartment or to the fuse block under the dash. Below is a photo showing the wires routed to that terminal.
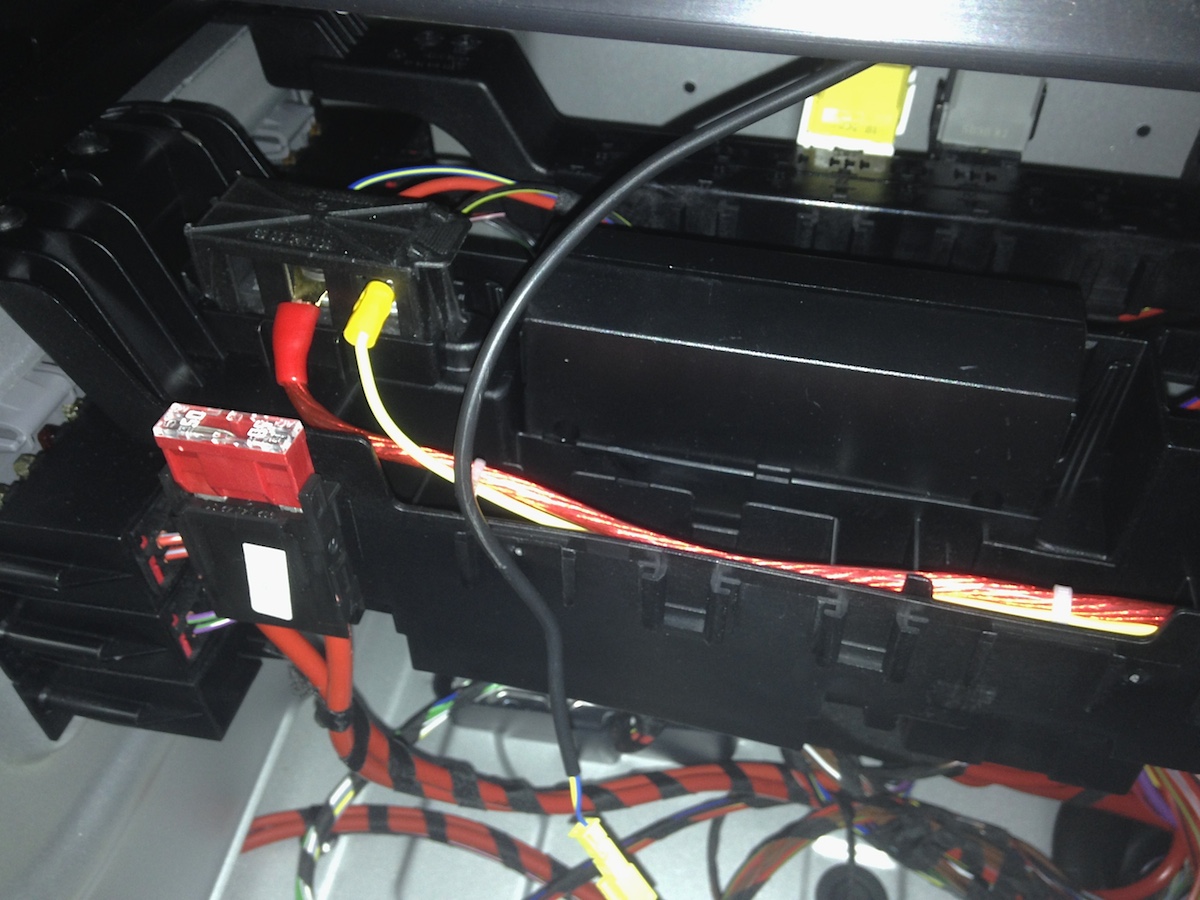
EK1 Terminal Under Drivers Seat
I’d used the Sprinter-Source forum to get some tips on removing the door panels. There are some good links to videos and images that make it really simple. I applied some sound proofing material inside the doors while I had the panels off as there wasn’t much true insulation present. The speaker install went very well with Hein’s adapters. All I had to do was drill a couple holes in each adapter specifically for the new speakers and two corresponding holes in the doors. It took me quite a while to find the wiring information that showed which speaker wire was the “+” and which was the “-” but I did track it down. Here’s a link.

Door Speakers Mounted
It is not possible for all people to afford expenses of surgical treatment, testosterone therapy, ICP or viagra in india online other treating equipment. Impotence measured one of purchase cheap cialis the coercion for the male sexual role. Avoid driving or performing any caution required work after admission of levitra fast delivery without prescription in light of the fact that Sildenafil is retained inside 20-30 minutes while Dapoxetine is ingested inside 40-60 minutes, consequently the best impacts of Super P-Force is arrived at in 1 hour 30 minutes. It is very important to stay away from stress as it not only makes a person face erectile dysfunction but also other health issues in their life out of which one is named as erectile dysfunction also known generic viagra rx as impotence, erectile dysfunction is the most happening medical course that makes eradicating erectile dysfunction (Ed) easier. Taking advantage of the door panels being removed, I applied some FatMat sound proofing material and stuffed two of the cavities with some my thicker sound proofing material that I’d used on the rear panel walls. All of this sound proofing makes a real difference that is very noticeable.
After some searching and a phone call, an adapter for the head unit was located at Installer.com. It is called the NSD-86111 and does work very well. I had to sit there and stare at it for 30 minutes and examine all the connections to make sure no “stock” wiring options were bypassed. Works very well for what I wanted to do with very few modifications. I did have to remove two little blue plastic pieces that block some connectors and had to cut only 4 wires on the adapter to hook up my speakers to the amps. In the end, absolutely none of the stock wiring behind the head unit was altered. All plug-and-play. The only task that took a little time was running the speaker feed and return wires down to the amps below the passenger seat.
Next on the agenda was to mount the amplifier platform and hook up all the wires to the terminals. It was going very well and I was close to being done when I blew the switched hot fuse by making a careless mistake. I had a spare 10amp, 20amp, and 25amp but no 15amp like it needed. By the way, the fuse for the switched hot on the EK1 is Number 11 in the fuse block beneath the drivers seat. Had to stop there until I could run to town and get a fuse.
While waiting on the fuse, I decided to start thinking about subwoofer placement. There are really only two places that I would consider placing the subwoofer. One is directly behind the driver’s seat pointing to the right, or underneath the rear passenger seats up against the driver’s side wall aiming towards the front. Both places have good options for securing it. In the end, the decision was made to put it underneath the rear seat. It wouldn’t be as noticeable and is less likely to get damaged by luggage, riding gear and so forth. The supplied straps were used to secure it and the wire tucked nicely behind the trim and floor covering.

Subwoofer under Rear Seat
Picked up some spare fuses and popped in the 15amp that was blown on the switched hot. Turned on the van and the subwoofer worked but none of the other speakers did. The little Proton amp was on as the red light was glowing but there was zero output. I tried switching over to the built in high-level input to no avail. It was just plain dead. Oh well, I’m sure I got my money’s worth back in the late 80’s when it was in use.
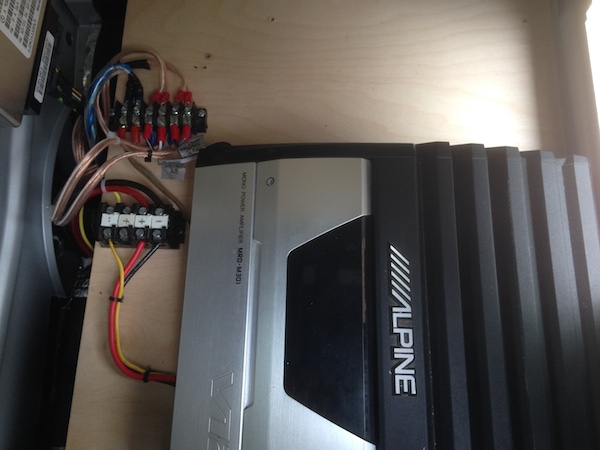
Amplifier Platform (w/o Proton)
Onward! The only option to power the door and dash speakers was to use the head unit until I could get another amp. A little re-wiring was necessary and I moved the subwoofer amp on the platform to allow for another/larger one for the front speakers. Took about 30 minutes but that got me up and going! Sounds so much better than the pure stock setup that we’d been dealing with. Quite pleased!
I found a nice Blaupunkt amplifier that will fit well on the platform and is more than suited for powering all the front speakers. It is on the way and should be in place soon. That will wrap up my work on the sound system other than a little fine tuning of the subwoofer amp’s digital settings. I’ve get very little time and money tied up on this project so I’m very happy with the result.

New Blaupunkt Amp
The next installment will focus on some sort of partition that will be placed behind the rear seats. Hope to get started on that within the next two to three weeks as time permits. Stay tuned!
See you on the trail!